


Cutlery Vinyl Wall Art Tutorial
It’s no secret that I kinda have a “thing” for vinyl projects.
So when Dezign With a Z contacted me about reviewing one of their projects, the wheels began to turn in the crafty section of my brain.
I headed over to the shop, and before I knew it I had been browsing for over an hour trying to narrow down my favorites from dozens and dozens of really awesome designs.
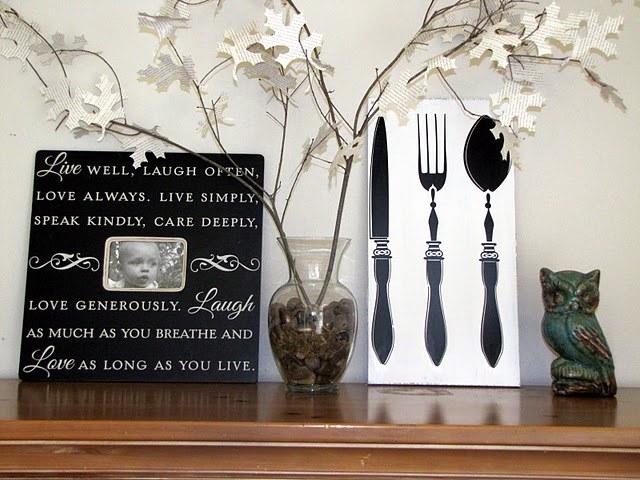
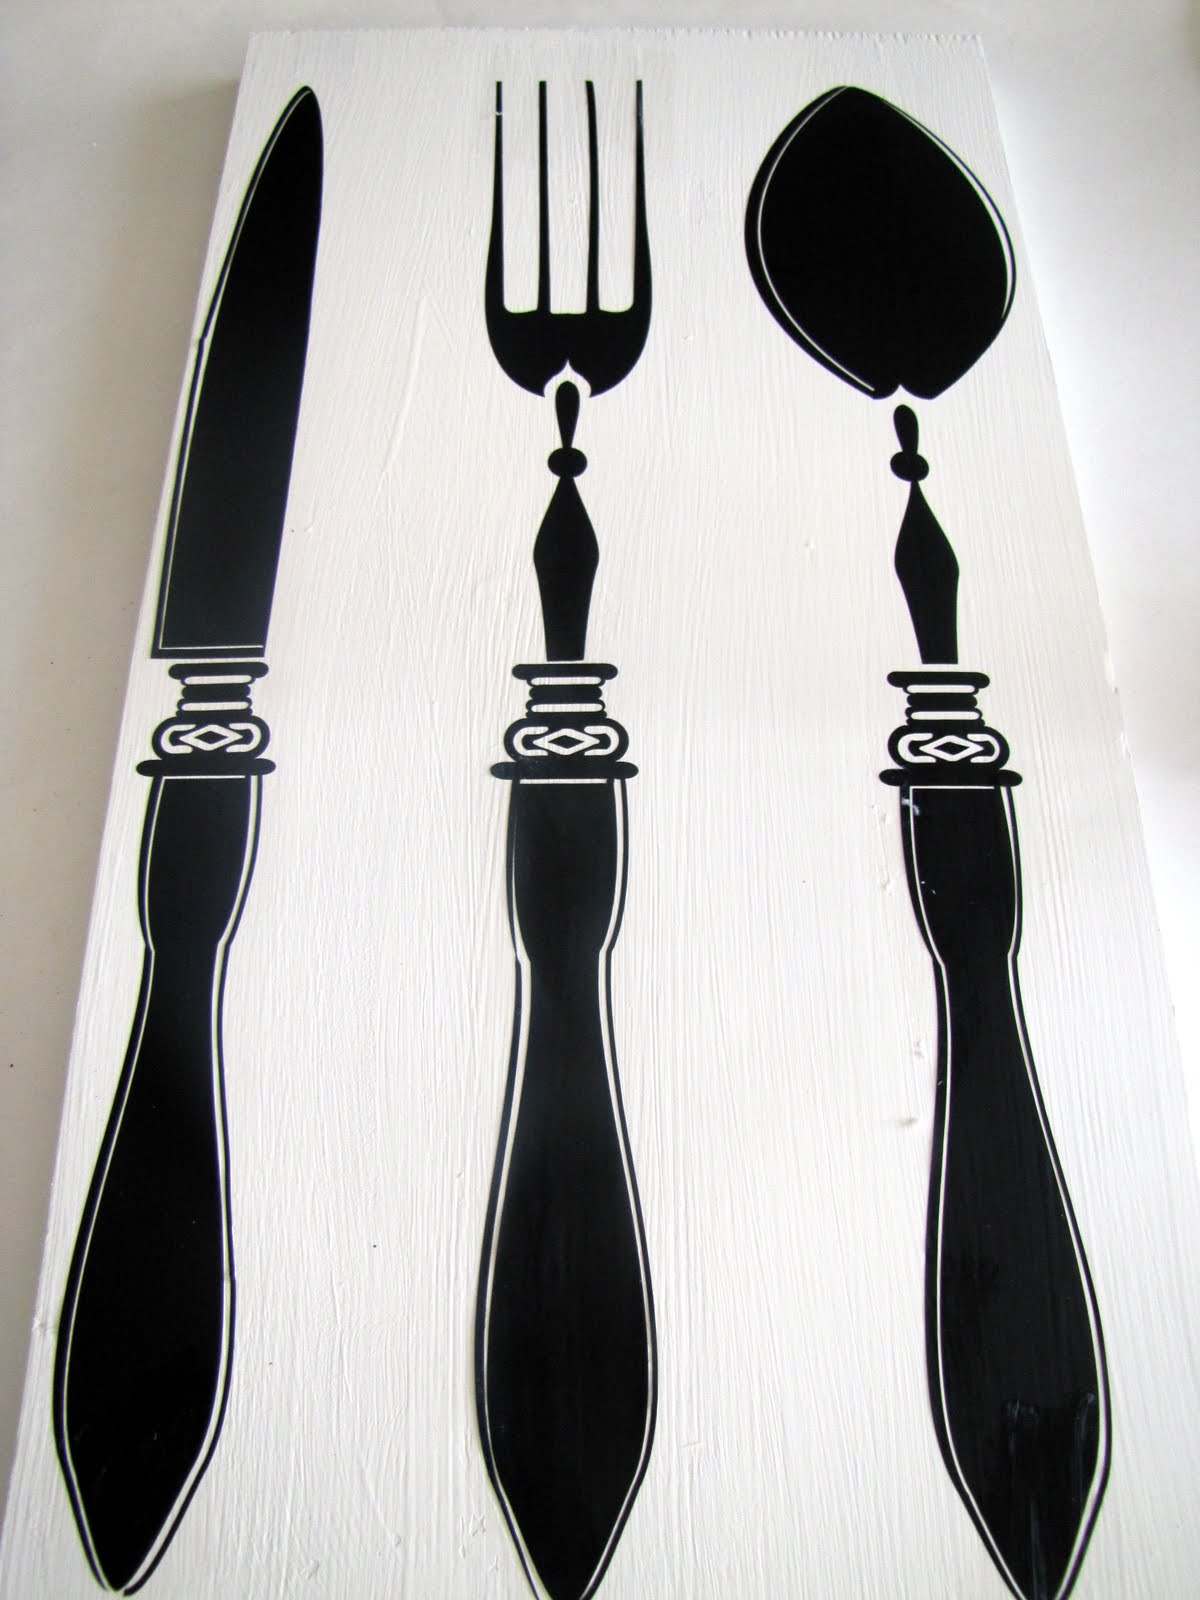
But, I had this picture in my mind of a project I wanted to complete for my eating area, and when I stumbled across this decal I knew it would be perfect:


Once I painted and applied the decal, I distressed the wood to give it the “look” I wanted. You can find this fun cutlery decal here.
Here is a step by step tutorial for my
Vinyl Cutlery Wall Art

Supplies:
Cutlery Vinyl 11 x 20 inches
Wood approx: 24 x 13 x 1 inches
White acrylic paint
Black acrylic paint
sand paper
paint brush
First, paint your entire top side and edges white. I didn’t paint the backside.
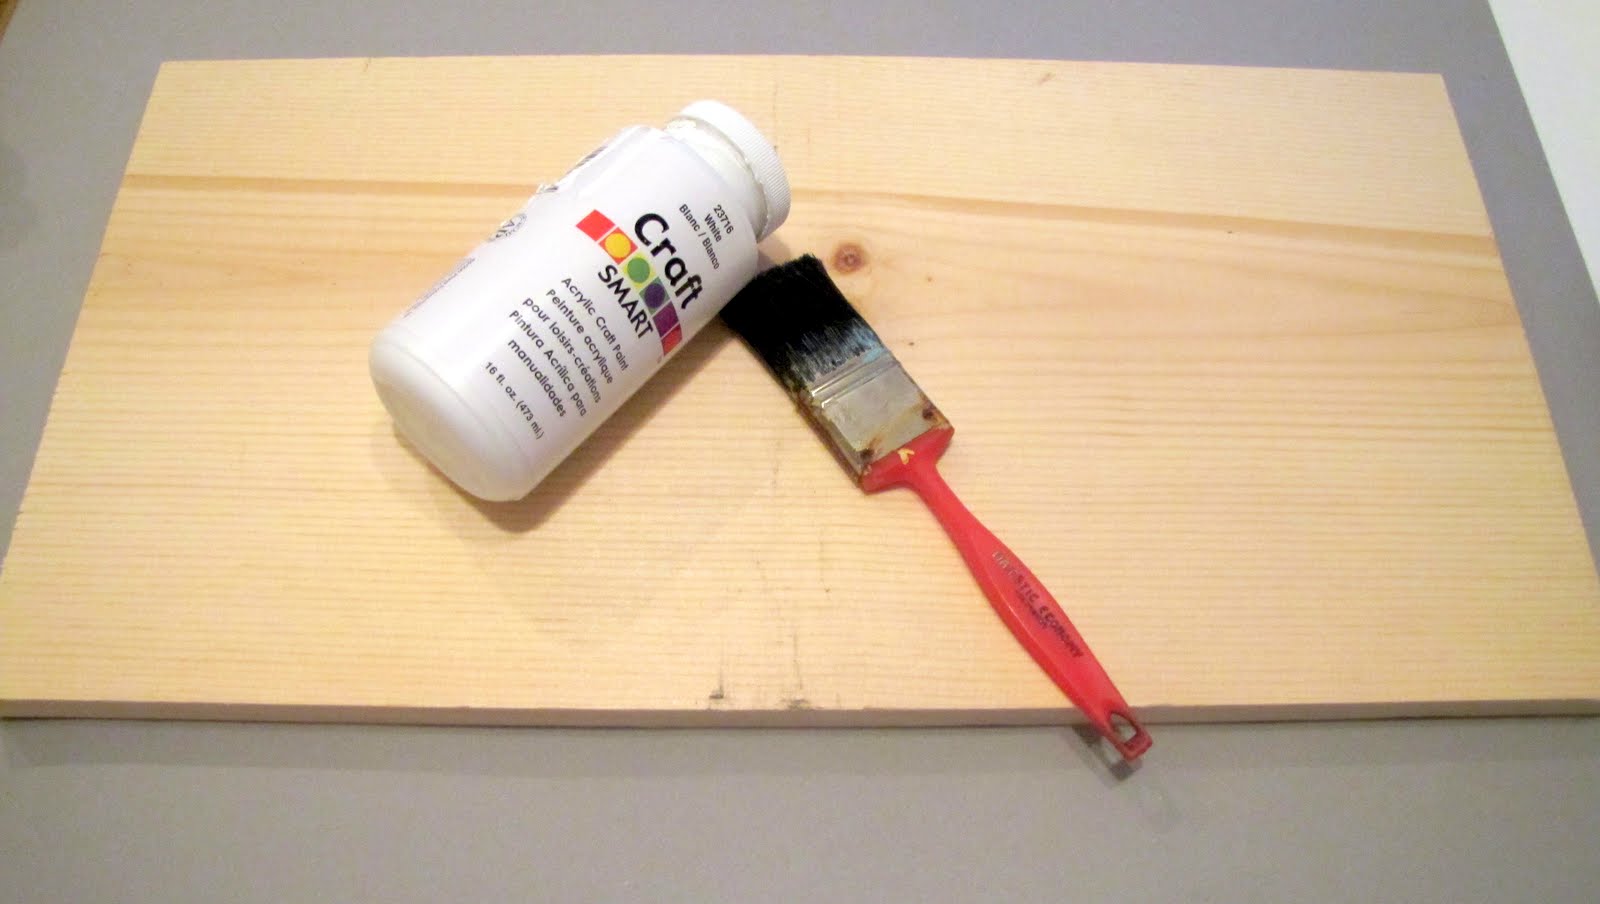
Let is dry.

Now paint the edges one coat of black. Let it dry. Don’t worry about painting the edges neatly–no one will see them anyway.

Once the black paint is dry, repaint the entire board white, so that the black edges are no longer visible.
Once again, I didn’t worry to much about how neatly I painted, because I was going for a more distressed look.

NOTE: Be sure to let the paint dry completely or else the vinyl will remove the paint {and won’t stick} when you try to apply it–I may or may not have learned this from personal experience.
Now remove the backing from your vinyl decal.

Carefully follow the instructions included in your order and place the vinyl centered on the wooden board.
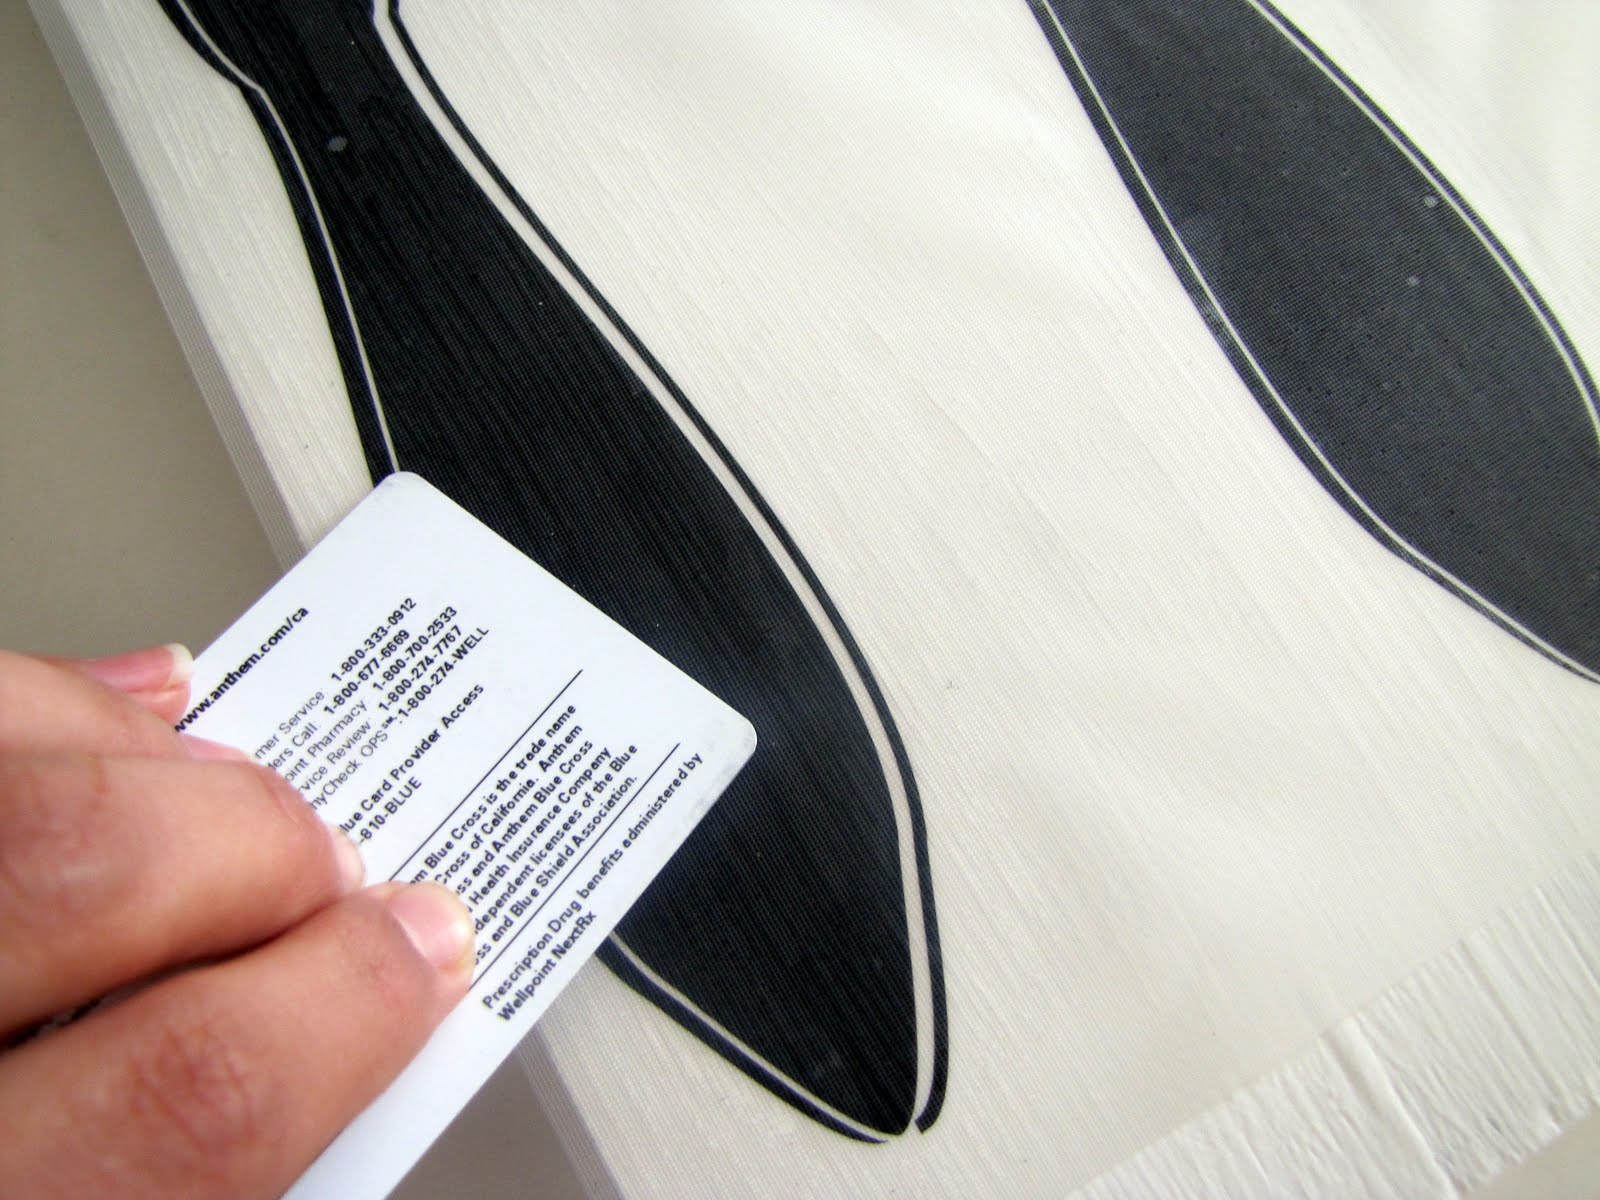
Use a credit card to rub the vinyl onto the board.
Then very slowly and carefully lift the adhesive from the board. If any of the vinyl starts to come up as you are lifting, just put the adhesive back down and use your credit card to rub it back in place.

And here is the “pre-distressed” board.
Now take the sand paper and distress the edges of the board to your hearts content.

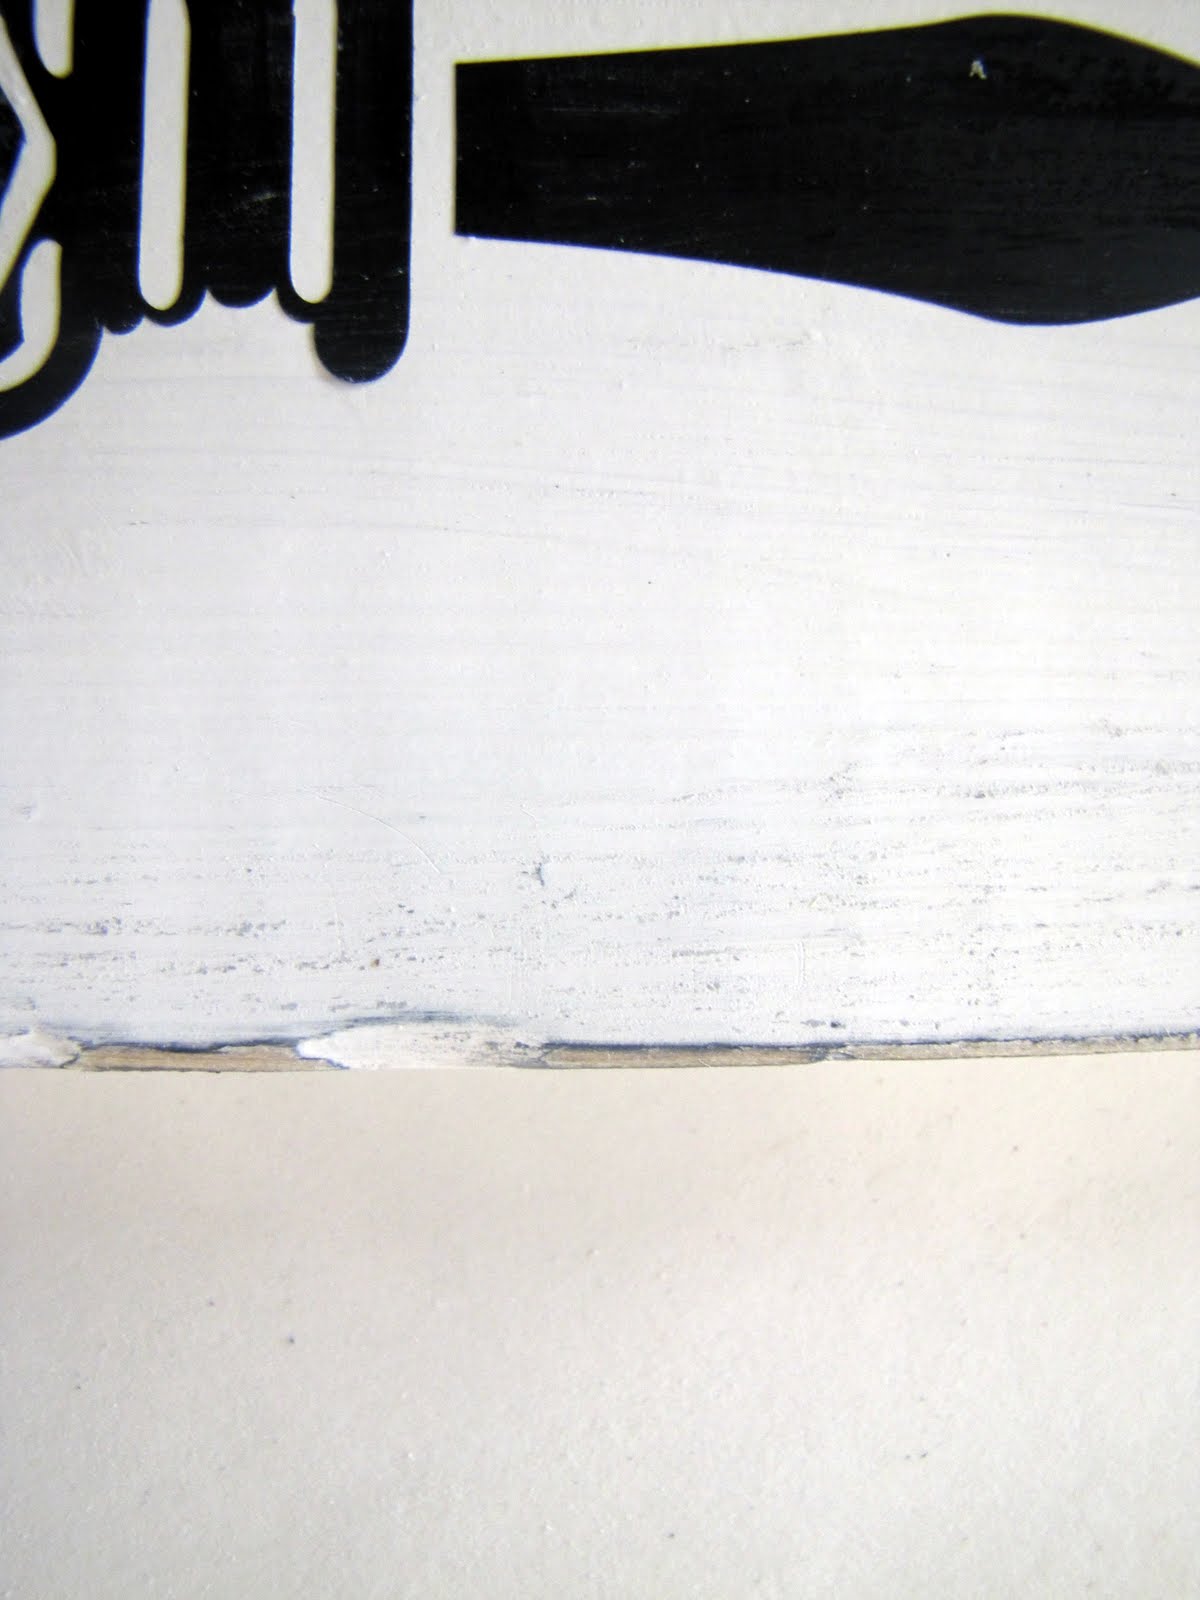
I even sanded on the face of the board to smooth out some of the uneven paint.
And that’s all there is to it–really simple, right?!
Dezign With a Z has a smorgasbord of fabulous designs your must check out.
Some of my favorites are:
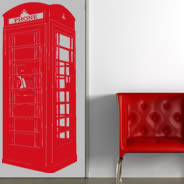
I think this London phone booth is incredible!
How great would that look on a wooden board!


My lap top wants this.


These clouds are perfect for Baby W’s room.
And I think this chalkboard decal is so great–especially when teaching your little ones to write.

So a big thank you to Dezign With a Z, for feeding my vinyl addiction, with one of my new favorite decals of all time!
You can visit Dezign With a Z on facebook for the latest and greatest deals by clicking here.
**I will be linking this project up to these fabulous link parties.**
~~~~~~~~~~~~~~~~~~~~~~~~
And don’t forget to enter the latest LMM giveaway for a FREE Silhouette craft cutter!!!
Over $300 value!

April
I love this! I'm going to have to check it out!
The Painted Cottage
That is TOO cute!
Kathie
I follow Little Miss Momma. 🙂
{northern cottage}
I'm loving the cutlery! What a great graphic image to cook and eat by! Yum
http://www.northerncottage.blogspot.com
Jennifer
My kitchen could use some kitchen-esque art! so flipping cute!
xoXOxo
Jenn @ Peas & Crayons
Carrie @ Dittle Dattle
I love vinyl and I love your project! so simple that it's amazingly beautiful 😀
I would be honored to have you add it to my blog party
Amaze Me Monday Blog Party
Now to head over to your giveaway!
Debbie
I love that! You are so clever.
♔Reyna♔
I really love this! It's so simple & easy. btw: just found ur blog thru A cup of jenn. Glad I did. I followed! if you get the chance pass by my blog and say hi.
-Reyna
http://www.glamglory.blogspot.com
PeaceLoveApplesauce
This is adorable!!
Romance In A Glance
Cute craft! I love the wall art you did! Pretty neat!
Have A Romantic Day & Check Me Out,
~Romantic Savy
Klove
Very cool…XOXO
Cori
What a handsome little guy! Congratulations to you guys on 18 adorable months.
Paper Trail Gallery
Loving the images on the board! I recently cut out silhouettes of a ballerina and another of a boy playing a trumpet. I sealed them onto boards and distressed them as well. Loved how they turn out! I used colored paint with mine but I love the crisp black/white look of yours. Thanks for sharing!
linsey grae
precious 🙂 how sweet of a mom you are! oh, and my favorite picture is him riding the bike backwards! adorable!
sweet european dreams
love the simplicity of it – very fun! and, I always appreciate a good tutorial – thanks! -diane
Anonymous
I would make shirts for my 3 little munchkins!!! By the way, I would give my left arm for this!!!! (I need my right one for all the fun projects!)
Jennifer Dixon
This is adorable! I'm going to have to keep them in mind, I'm always looking for new stuff for my kitchen. I'm new the blogging world, I just signed up to follow you, I'd love if you'd check mine out.
http://lifecraftsandwhatever.blogspot.com/
Miranda
That turned out super-cute!
Miranda
http://www.justdrinkacoke.blogspot.com
Confession's of a girl
lOVE THIS!
Here's a question for you or anyone reading for tha matter..
I love this but was going to try to switch it up a little..
Do they have vinal letters?
Something so I can make my own fancy sign for my home? I was at the craft store and they only had HUGE BLOCK ones. Something cutesy?? I am looking to start out with a "happy valentines day" sign (wouldnt this be cute? but instead of painting with the black use red so it shines underneath?) and then go on to a "welcome" one.
Please Help.
-Craft Challenged Tiffany
http://tiffanymcginley.blogspot.com/
Ashley @ Little Miss Momma
hi Tiffany,
On the Dezign With a Z website {which is where I ordered my vinyl}, there is a link where you can create custom vinyl lettering and spell out whatever you want.
Here is the link: http://www.dezignwithaz.com/custom-lettering/lettering/custom-quotes-wording-alphabet-wall-decals-p-1384.html
I hope this helps. I think the V-Day sign idea will be adorabel!!!!
xoxo,
ashley
Life as a working mom
I really would love to get a vinyl lettering machine. I am in the process of putting all my subway art together and sell on my website. http://www.deesdailynews.com
C.R.A.F.T.
I really want one of these to remind myself of how to set a place setting! HA! Come on over and link up to MMM
C.R.A.F.T.
Love this 🙂 I am going to feature you next Monday! Thank you for linking up to MMM!
Silhouette Subway Art: Little Miss Momma - Little Miss Momma
[…] program. 2. Cut out your vinyl following the instructions in your Silhouette Handbook. 3. Then click HERE to see my tutorial for painting and distressing the board and applying the vinyl. And if you want […]
Lucia
Imagine that you possibly can find many individuals these days making use of
mobile devices. Cell phone numbers are not a matter of
public information. But it is really simply a term describing the process to search and trace a cellular phone number
and the details of the owner.
domain
What’s up to all, how is the whole thing, I think every one is getting more from this web page, and your views
are fastidious designed for new viewers.
10 quadri fai da te per la casa
[…] 10. Quadretti da creare con gli adesivi in vinile già pronti, tutorial di littlemissmomma […]
sitemaker
very creative!! thank you for sharing your tutorials!
HERVE LEGER
“I love the idea of movement, but this White Bandage Dress can be especially difficult to achieve with a knit because they’re all
Peter Cooper
This is amazing thanks for sharing this blog I have become a fan of your blogs now. This blog is so interesting and informative.